
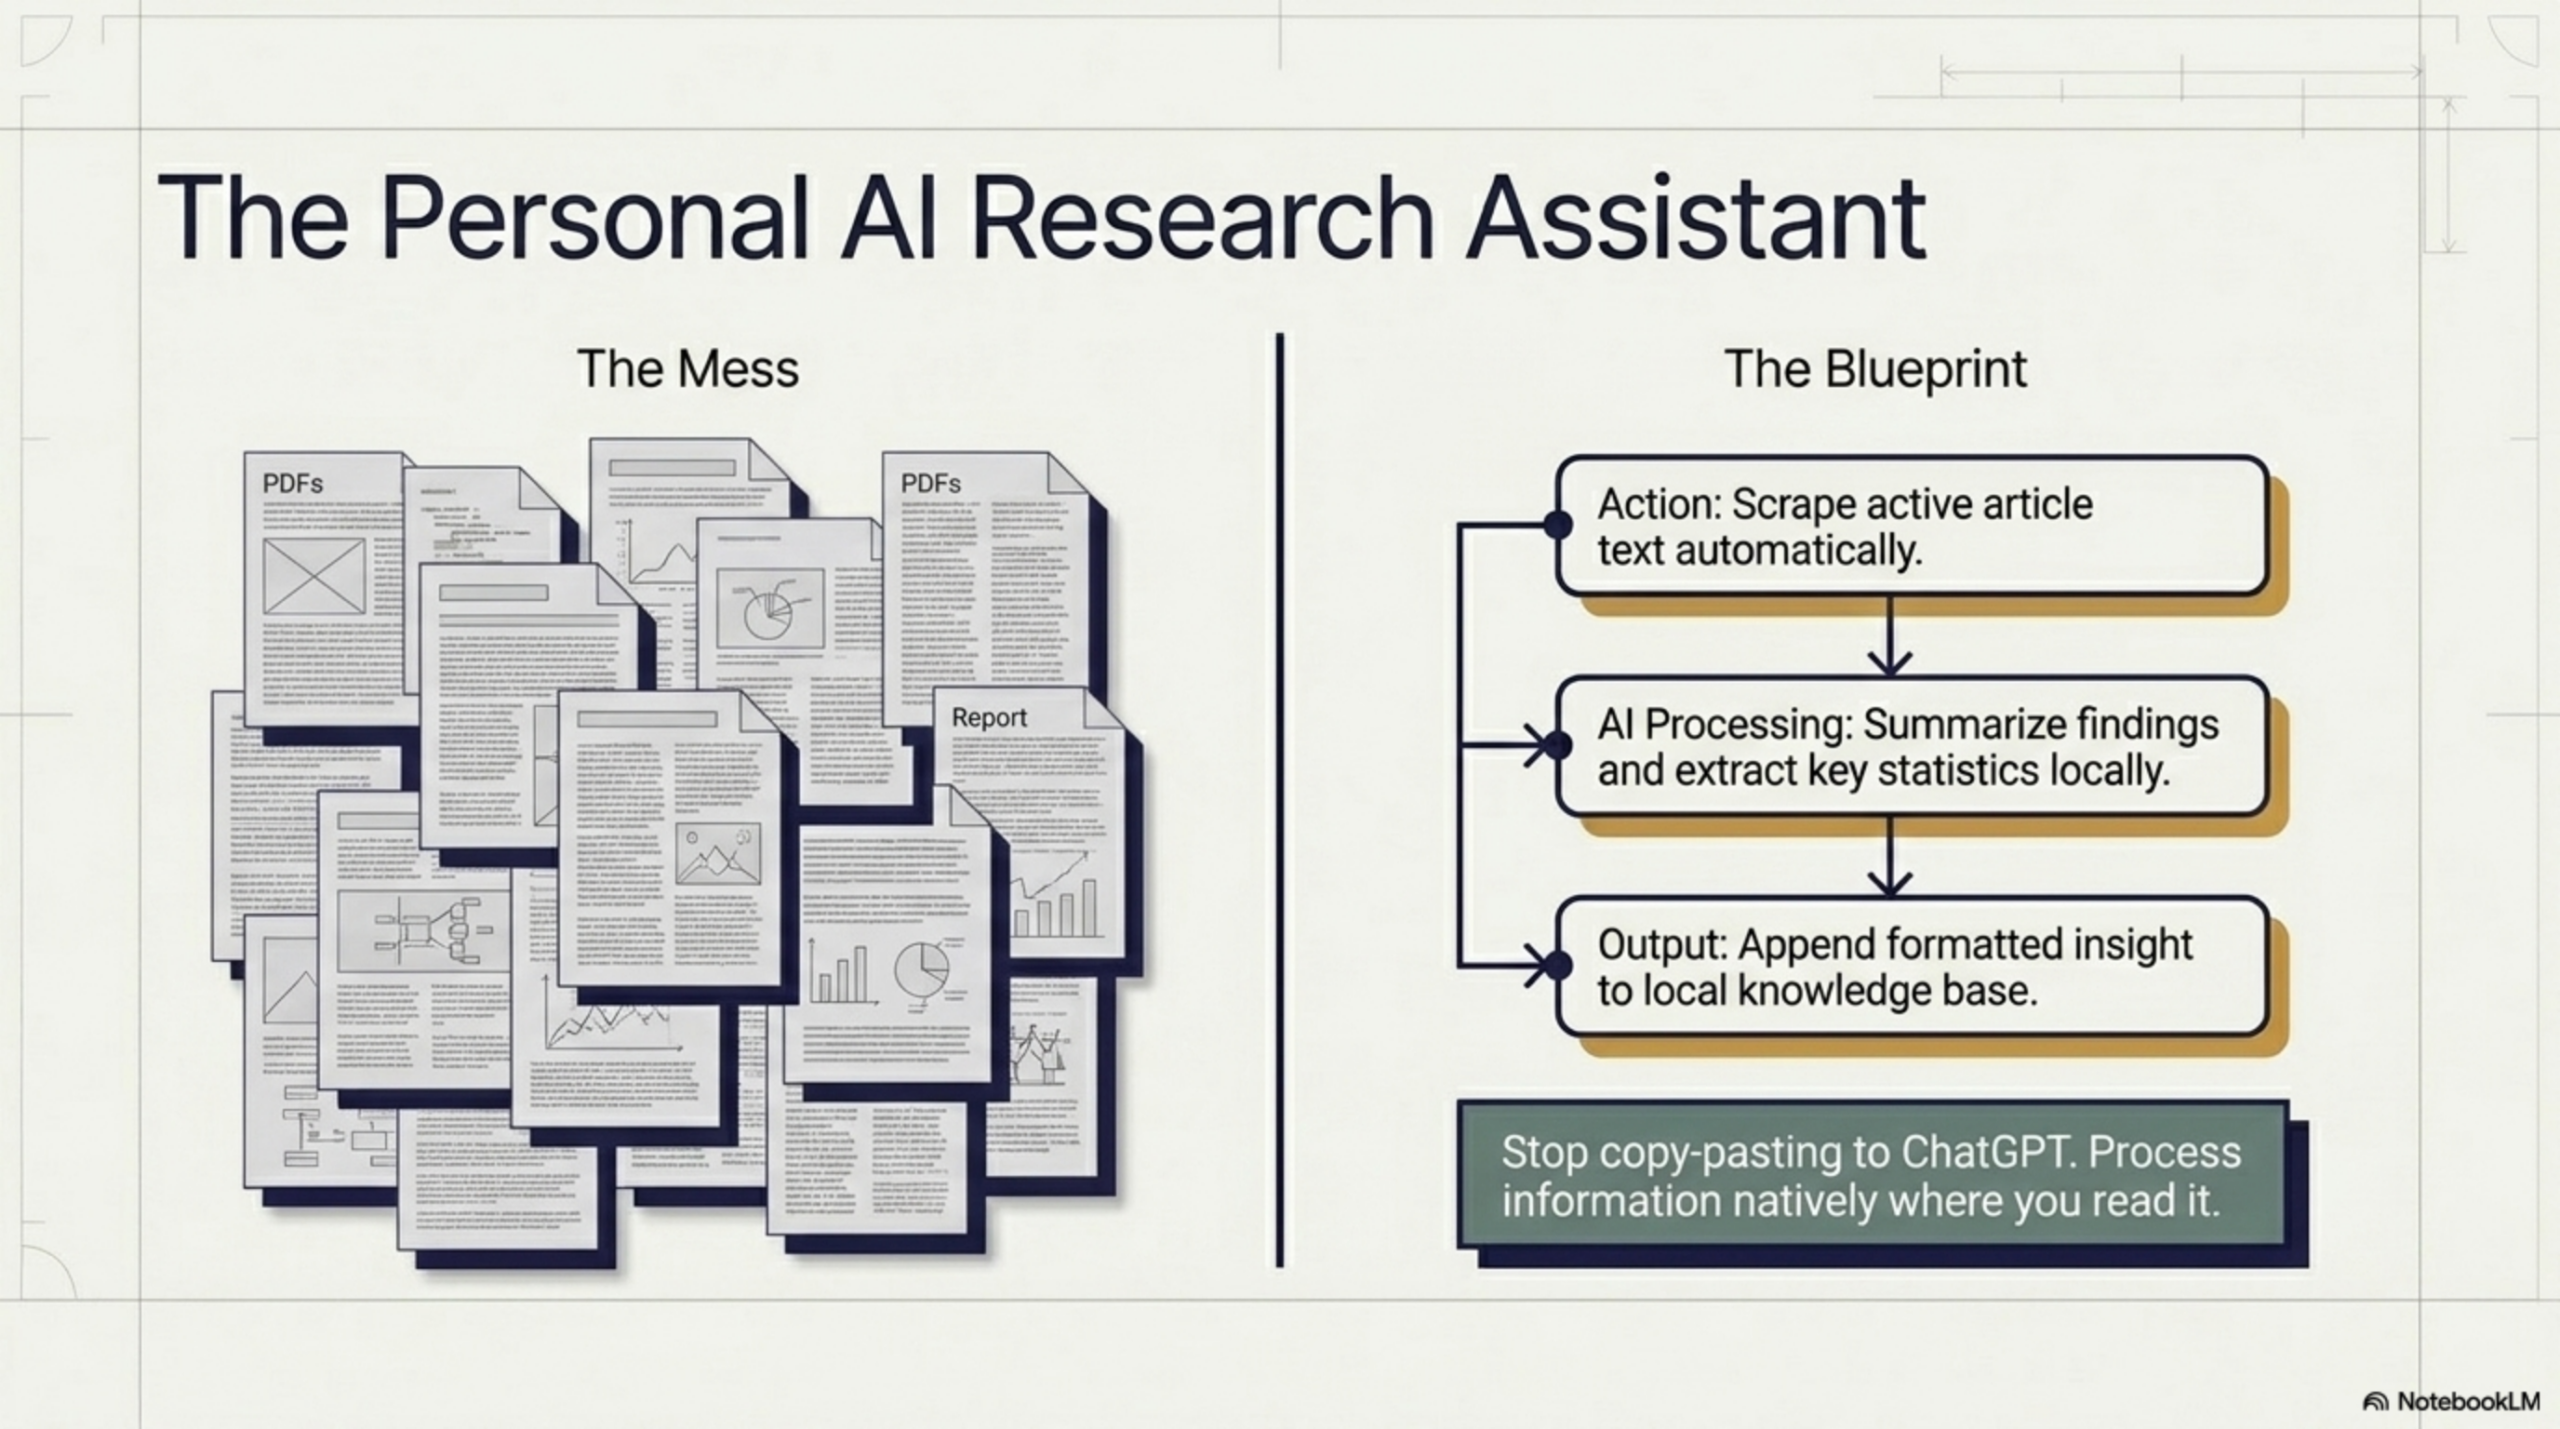
Here is a workflow that repeats dozens of times every day for researchers, journalists, analysts, and knowledge workers everywhere: open a new tab, find an article or report, read a section, switch to another tab to ask an AI assistant about it, copy and paste the relevant text, wait for a response, switch back to the source, repeat. It is fragmented, slow, and mentally exhausting — not because the individual steps are hard, but because the constant switching erodes focus and makes it nearly impossible to build up a coherent picture across multiple sources.
What if your AI research assistant lived inside the browser, on the page you are already reading — no tab switching, no copy-paste, no setup? That is exactly what you can build with Agentic Workflow, a Chrome extension that lets you create visual AI automations running entirely in your browser. This guide shows you how to build a personal AI research assistant from scratch, step by step.
What a Browser-Native AI Research Assistant Can Do
A browser-native AI research assistant is different from a standalone AI tool in one key way: it reads the page you are on and processes it in context, without you having to manually provide that context. Here is what it can do:
- Summarize any article or report with a single click
- Extract key claims, statistics, or named entities from a page
- Answer specific research questions based on the current page content
- Compare information across multiple pages you have visited
- Highlight contradictions or gaps between multiple sources
- Generate structured notes or outlines from raw web content
- Translate dense technical content into plain language
Because it runs in your browser, it works on authenticated pages, paywalled content (that you have access to), internal documents, and dynamic web apps — places a standard AI chatbot cannot reach.
How It Works: The Architecture
Agentic Workflow uses a visual node-based builder. A research assistant workflow typically has three layers:
- Trigger: A button click, URL match, or keyboard shortcut that activates the workflow on the current page.
- DOM Selector: A node that extracts the main body text (or a specific section) from the current page.
- LLM Chain: A node that sends the extracted text to an AI model — either a cloud model or a local model via Ollama/WebLLM — with a custom research prompt.
- Output: The AI’s response is displayed inline as a floating panel on the page, or saved to a note, a Google Sheet, or a local file.
The entire flow runs inside your browser. No data is sent to any external server unless you explicitly connect a cloud AI provider or output node.
Step-by-Step: Build Your Research Assistant
Step 1: Install Agentic Workflow
Install the Agentic Workflow Chrome extension from the Chrome Web Store. Click the extension icon to open the visual builder.
Step 2: Create a Trigger Workflow
Click New Workflow. For a research assistant, the best trigger type is a Manual Button — a floating button that appears on every page and activates the workflow when you click it. You can also set the trigger to a keyboard shortcut for even faster access. Give the workflow a name like “Research Assistant” or “Quick Summarize.”
Step 3: Extract Page Content with DOM Selector
Add a DOM Selector node. For most articles and reports, you want to select the main content area — typically a article tag, a main element, or the largest text block on the page. The node’s visual picker lets you click on any element to capture its selector automatically. Enable the Extract Text option to pull the clean text content without HTML markup.
For long pages, you can add a Truncate option to cap the extracted content at a token limit that fits your AI model’s context window.
Step 4: Connect an LLM Node with a Research Prompt
Add an LLM Chain node and connect it to the DOM Selector output. In the prompt field, write your research instruction. For example:
- “Summarize this article in 5 bullet points, focusing on key findings and statistics.”
- “Extract all claims that require verification. List them as separate bullet points.”
- “What are the main arguments made in this article? What evidence is provided for each?”
- “Identify the author’s key assumptions and any logical gaps in the argument.”
Choose your AI provider (OpenAI, Anthropic, or a local model) in the node settings. The extracted page content is automatically injected into the prompt as context.
Step 5: Display Results Inline
Add an Inline Display node as the final output. This renders the AI’s response as a floating panel on the current page — no tab switch required. You can also add a Copy to Clipboard node or a Google Sheets node if you want to save the output to a note or tracker automatically.
Advanced: Chain Multiple Pages for Deep Research
For deeper research projects, you can build multi-page workflows that accumulate context across several sources. One approach is to use an Array Accumulator node that stores the summary or key claims from each page you visit, then triggers a final synthesis step after you have processed a set number of pages.
For example: visit five academic papers, let the assistant extract and summarize each one, then trigger a final LLM prompt that synthesizes all five summaries into a unified research brief. All of this happens in the browser, in real time, without ever leaving your reading flow.
Use a Local AI Model for Privacy
If you are researching sensitive topics — competitive intelligence, legal documents, medical information, confidential company data — you may not want your content sent to a cloud AI provider. Agentic Workflow supports Ollama and WebLLM for fully local AI processing.
- Ollama: Run models like Llama 3, Mistral, or Gemma locally on your machine. Agentic Workflow connects to Ollama’s local API endpoint. No data ever leaves your device.
- WebLLM: Run smaller models entirely in the browser using WebGPU — no installation required, no external connections at all.
Local models are slower than cloud APIs but provide complete data privacy. For most research summarization tasks, a 7B or 13B parameter model is more than capable.
Real Use Cases
Here are concrete examples of how different knowledge workers use browser-native AI research assistants built with Agentic Workflow:
- Academics: Automatically extract abstracts, methodologies, and conclusions from research papers. Generate structured literature review notes without switching to a separate tool.
- Journalists: Quickly fact-check claims in press releases against background material. Extract quotes and key facts from lengthy transcripts or reports.
- Market analysts: Summarize earnings reports, product announcements, and industry news in seconds. Track competitor messaging changes across multiple sources.
- Sales representatives: Research prospects before calls — extract company news, product updates, and key talking points from company websites and LinkedIn pages in one click.
- Legal professionals: Summarize lengthy legal documents, highlight key obligations, and identify defined terms — using a local model to ensure client confidentiality.
Conclusion
A browser-native AI research assistant is not a luxury — it is a fundamental productivity upgrade for anyone whose work involves reading and synthesizing information from the web. By keeping AI on the page rather than in a separate tab, you eliminate the context-switching friction that makes research feel slow and fragmented.
Agentic Workflow gives you all the building blocks to create this assistant yourself, in minutes, without any coding or server setup. Your first workflow will work on the very next article you open.
Ready to start? Install Agentic Workflow from the Chrome Web Store and build your personal AI research assistant today — it runs entirely in your browser, no code required.

How to Scrape and Summarize Any Web Page with AI » Agentic Workflow
April 27, 2026[…] AI summarization goes further. Instead of just pulling text, it comprehends it — identifying the key points, answering specific questions, reformatting the content into bullet points, or highlighting action items. Combined with browser-native scraping that can reach any live page, this becomes a genuinely powerful research tool — and if you want to take it further, you can build a full personal AI research assistant that runs in your browser. […]